twESP32GPS
Stratum 1 NTP Server & Satellite Dashboard
for Seeed Studio XIAO ESP32-S3 + VK2828U7G5 GPS Module


Overview
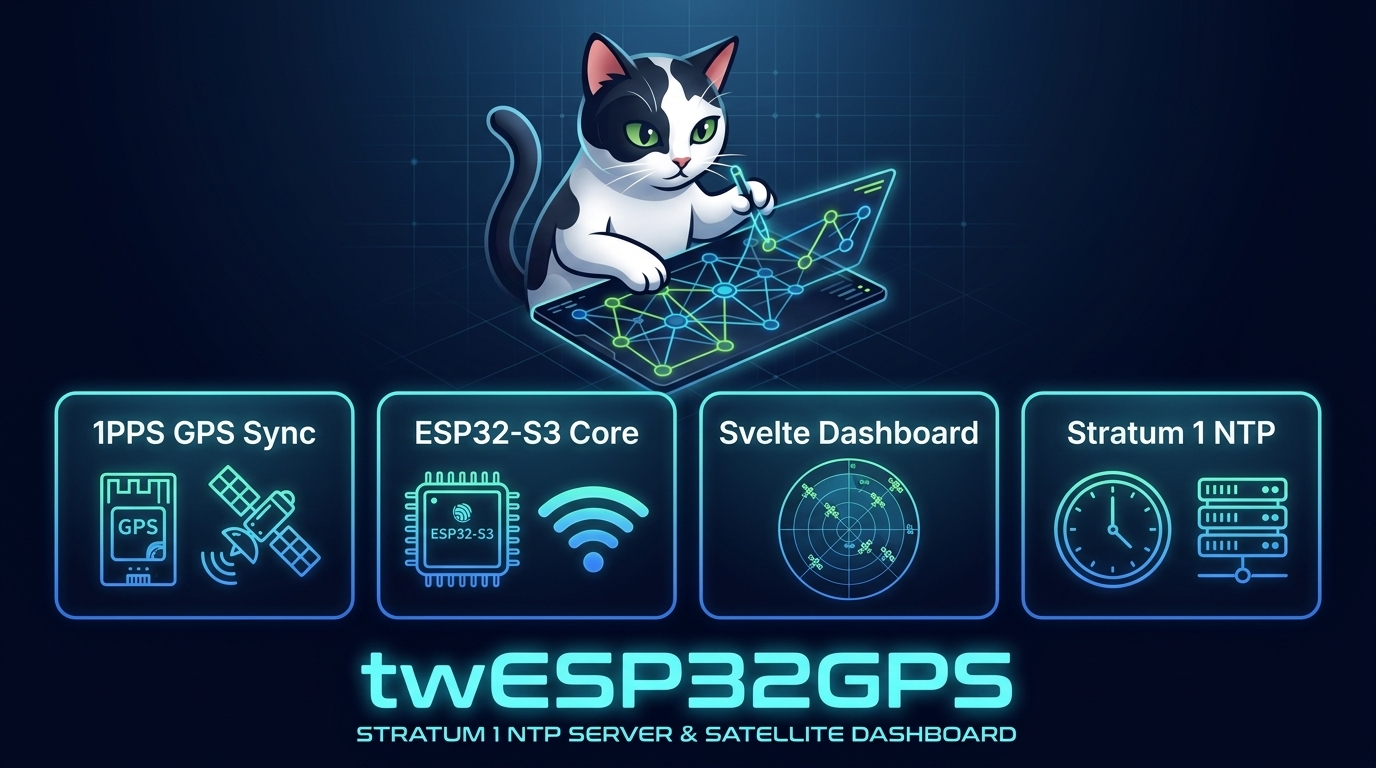
twESP32GPS is an Arduino-based firmware for the Seeed Studio XIAO ESP32-S3 microcontroller paired with a VK2828U7G5 multi-constellation GPS module.
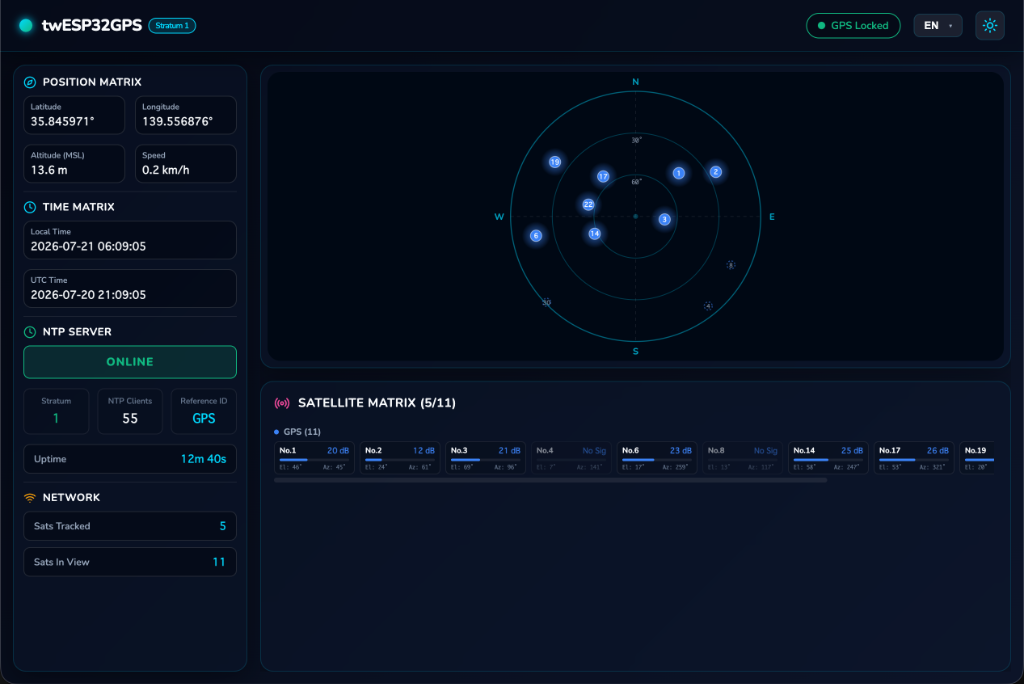
It turns a tiny, low-cost ESP32-S3 board into a Stratum 1 NTP time server that is disciplined by a 1PPS (pulse-per-second) hardware interrupt from the GPS module, achieving sub-millisecond timing accuracy. In addition to precise timekeeping, a browser-based dashboard gives you a real-time sky plot of all visible satellites across six GNSS constellations.
Key Highlights
- No dedicated GPS server hardware needed — runs entirely on a compact XIAO ESP32-S3 board
- 1PPS-disciplined NTP for high-accuracy time distribution on your LAN
- Live satellite visualization in your browser — no app installation required
- Zero-config WiFi setup via captive portal on first boot
- Bilingual UI (English / Japanese) switchable from the dashboard
Features
| Feature | Description |
|---|---|
| 🛰️ Stratum 1 NTP Server | GPS-disciplined, 1PPS hardware interrupt for sub-millisecond accuracy. Implements RFC 4330 / RFC 5905. |
| 🌐 Web Dashboard | Svelte 5 single-page app with real-time satellite Sky Plot (Canvas 2D). Served from LittleFS as gzip-compressed HTML. |
| 📡 Multi-constellation | Tracks GPS, GLONASS, Galileo, BeiDou, QZSS, and SBAS satellites simultaneously. |
| 🔧 WiFiManager | Captive Portal for easy WiFi configuration on first boot — no hardcoded credentials. |
| 🌍 EN/JA Bilingual UI | English and Japanese dashboard interface switchable at runtime. |
| 📊 REST JSON API | GET /api/gps endpoint returns full GPS state (fix, position, satellites, NTP stats) as JSON. |
| ⏱️ Uptime & Client Tracking | Tracks device uptime and total NTP client request count. |
| 💾 LittleFS Storage | Frontend assets stored in the ESP32 flash filesystem (LittleFS), served via HTTP. |
Required Hardware
| Item | Quantity | Notes |
|---|---|---|
| Seeed Studio XIAO ESP32-S3 | 1 | Main microcontroller board |
| VK2828U7G5 GPS Module | 1 | Multi-constellation GNSS with 1PPS output |
| USB-C cable | 1 | For programming and power |
| Jumper wires | 6 | 6 connections (GND, VCC, TX, RX, PPS, EN) |
| Breadboard (optional) | 1 | For prototyping |
Power note: The XIAO ESP32-S3 and GPS module both operate at 3.3 V. The GPS VCC and EN pins connect directly to the board’s 3V3 rail.
Circuit Diagram
Wiring Table
| GPS Pin | Label | XIAO ESP32-S3 Pin | GPIO |
|---|---|---|---|
| G | GND | GND | — |
| V | VCC | 3V3 | — |
| T | TX (GPS→ESP) | D7 | GPIO 44 |
| R | RX (ESP→GPS) | D6 | GPIO 43 |
| B | PPS | D1 | GPIO 2 |
| E | EN (Enable) | 3V3 | — |
Wiring Diagram (ASCII)
VK2828U7G5 GPS Module          XIAO ESP32-S3
┌─────────────────┐            ┌──────────────────┐
│  G  (GND)  ─────┼────────────┼─ GND             │
│  V  (VCC)  ─────┼────────────┼─ 3V3             │
│  T  (TX)   ─────┼────────────┼─ D7  (GPIO 44)   │
│  R  (RX)   ─────┼────────────┼─ D6  (GPIO 43)   │
│  B  (1PPS) ─────┼────────────┼─ D1  (GPIO 2)    │
│  E  (EN)   ─────┼────────────┼─ 3V3             │
└─────────────────┘            └──────────────────┘
                                      │
                                   USB-C
                                 (to PC/power)
Wiring Photo
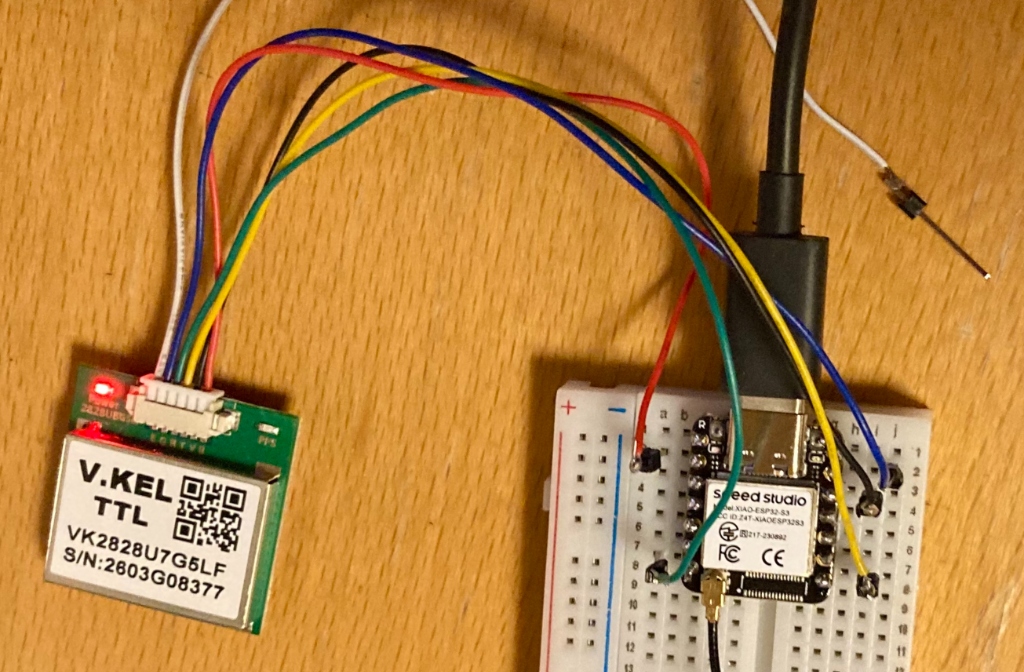
1PPS Signal: The PPS pin generates a precise pulse every second at the exact GPS second boundary. The firmware captures this pulse via a hardware interrupt (
RISINGedge on GPIO 2) to discipline the NTP timestamps.
Project Structure
twESP32GPS/
├── mise.toml                    # Development environment (arduino-cli + node)
├── twESP32GPS/                  # Arduino sketch
│   ├── twESP32GPS.ino           # Main entry point (setup/loop)
│   ├── config.h                 # Pin definitions & constants
│   ├── gps.h / gps.cpp          # GPS parsing (TinyGPS++ + custom NMEA GSV)
│   ├── ntp.h / ntp.cpp          # NTP UDP server (RFC 5905, Stratum 1)
│   ├── web.h / web.cpp          # HTTP server + /api/gps JSON endpoint
│   ├── dashboard.h              # Embedded gzipped Svelte dashboard (auto-generated)
│   └── data/                    # LittleFS filesystem root
│       └── index.html.gz        # Svelte dashboard (built by scripts/)
├── frontend/                    # Svelte 5 + Vite frontend source
│   ├── src/
│   │   ├── App.svelte           # Main UI (3-pane layout)
│   │   ├── components/
│   │   │   └── SkyPlot.svelte   # Canvas 2D satellite sky plot
│   │   ├── i18n.svelte.js       # EN/JA translations
│   │   └── style.css            # Glassmorphic dark/light theme
│   └── vite.config.js           # Vite + gzip compression config
└── scripts/
    ├── install_libs.sh          # Install Arduino libs & board core
    ├── build_frontend.sh        # Build Svelte → gzip → dashboard.h
    ├── build_fw.sh              # Compile Arduino firmware
    ├── flash.sh                 # Flash firmware + upload LittleFS
    └── inline_and_convert.js    # Inline assets and convert to C++ header
Prerequisites
Software
| Tool | Version | Install |
|---|---|---|
| arduino-cli | latest | brew install arduino-cli (macOS) |
| Node.js | ≥ 20 | via mise or nvm |
| mise | latest | curl https://mise.run \| sh (optional but recommended) |
Arduino Libraries (auto-installed by install_libs.sh)
| Library | Version |
|---|---|
| TinyGPS++ | latest |
| ArduinoJson | v7.x |
| WiFiManager | latest |
| esp32:esp32 board core | ≥ 3.x |
Build & Flash
1. Clone the Repository
git clone https://github.com/twsnmp/twESP32GPS.git
cd twESP32GPS
2. Install Dependencies
# Install mise (if not already installed)
curl https://mise.run | sh

# Install all dependencies: ESP32 board core + Arduino libs + npm packages
mise run install
Or without mise:
# Install Arduino libraries and board core
bash scripts/install_libs.sh

# Install frontend npm dependencies
cd frontend && npm install && cd ..
3. Build Frontend
Compile the Svelte dashboard, inline all assets, and generate dashboard.h:
mise run build-frontend
# or:
bash scripts/build_frontend.sh
4. Compile Firmware
mise run build
# or:
bash scripts/build_fw.sh
5. Flash to XIAO ESP32-S3
Plug in the XIAO ESP32-S3 via USB-C, then:
mise run flash
# or (auto-detect port):
bash scripts/flash.sh

# or specify port explicitly:
bash scripts/flash.sh /dev/tty.usbmodem1101   # macOS
bash scripts/flash.sh /dev/ttyACM0            # Linux
The flash script performs the following steps:
- Compiles the firmware
- Uploads the compiled binary to flash
- Uploads the LittleFS filesystem image (containing the dashboard)
Configuration
WiFi Setup (First Boot)
On first boot (or when WiFi credentials are not saved), the device starts a WiFi Access Point:
| Setting | Value |
|---|---|
| SSID | twESP32GPS-Setup |
| Password | (none — open AP) |
| Portal URL | http://192.168.4.1 |
| Portal timeout | 3 minutes |
Steps:
- Connect your phone or laptop to the
twESP32GPS-SetupWiFi network - A captive portal page should open automatically (or open
http://192.168.4.1manually) - Select your home/office WiFi network and enter the password
- The device restarts and connects to your network
After connecting, the device’s IP address is printed to the serial console:
[WiFi] Connected! IP: 192.168.1.xxx
[Ready] NTP: 192.168.1.xxx:123 | Web: http://192.168.1.xxx/
Firmware Constants (config.h)
You can change the following constants by editing twESP32GPS/config.h before compiling:
| Constant | Default | Description |
|---|---|---|
GPS_BAUD |
9600 |
GPS module baud rate |
GPS_RX_PIN |
44 |
GPIO for GPS TX → ESP RX (D7) |
GPS_TX_PIN |
43 |
GPIO for GPS RX → ESP TX (D6) |
PPS_PIN |
2 |
GPIO for 1PPS signal (D1) |
NTP_PORT |
123 |
NTP server UDP port |
HTTP_PORT |
80 |
HTTP web server port |
WIFI_AP_NAME |
"twESP32GPS-Setup" |
Access point SSID for WiFi setup |
WIFI_AP_PASS |
"" |
AP password (empty = open) |
MAX_SATELLITES |
48 |
Maximum satellite entries to store |
Frontend Development (Live Reload)
To develop the UI locally with live reload, proxy API calls to a real ESP32:
# Edit frontend/vite.config.js and update the proxy target to your ESP32 IP
cd frontend
npm run dev
# Open: http://localhost:5173
Accessing the Device
Once on your network, access the device via the IP shown in the serial console:
| Service | URL / Address |
|---|---|
| Web Dashboard | http://<ESP32-IP>/ |
| GPS JSON API | http://<ESP32-IP>/api/gps |
| NTP Server | UDP <ESP32-IP>:123 |
API Reference
GET /api/gps
Returns the current GPS state and satellite data as JSON.
Example response:
{
  "hasFix": true,
  "time": "03:34:56",
  "date": "2025-07-19",
  "latitude": 35.681236,
  "longitude": 139.767125,
  "altitude": 40.5,
  "speedKmh": 0.2,
  "numSatellites": 8,
  "numSatsInView": 14,
  "stratum": 1,
  "uptime": 3600,
  "ntpClients": 42,
  "satellites": [
    { "prn": 1,  "system": "GPS",     "elevation": 45, "azimuth": 120, "snr": 38 },
    { "prn": 65, "system": "GLONASS", "elevation": 32, "azimuth": 210, "snr": 30 },
    { "prn": 11, "system": "Galileo", "elevation": 20, "azimuth": 310, "snr": 25 }
  ]
}
Field descriptions:
| Field | Type | Description |
|---|---|---|
hasFix |
bool | true if GPS has a valid position fix |
time |
string | UTC time (HH:MM:SS) |
date |
string | UTC date (YYYY-MM-DD) |
latitude |
float | Latitude in decimal degrees |
longitude |
float | Longitude in decimal degrees |
altitude |
float | Altitude in meters |
speedKmh |
float | Speed over ground (km/h) |
numSatellites |
int | Satellites used in fix (from GGA) |
numSatsInView |
int | Total satellites in view (from GSV) |
stratum |
int | NTP stratum: 1 = GPS fix, 16 = no fix |
uptime |
int | Device uptime in seconds |
ntpClients |
int | Total NTP requests served since boot |
satellites[] |
array | Per-satellite detail (see below) |
satellites[].prn |
int | Satellite PRN number |
satellites[].system |
string | Constellation: GPS, GLONASS, Galileo, BeiDou, QZSS, SBAS |
satellites[].elevation |
int | Elevation angle (degrees, 0–90) |
satellites[].azimuth |
int | Azimuth angle (degrees, 0–359) |
satellites[].snr |
int | Signal-to-noise ratio (dBHz, 0 = not tracked) |
Testing
Serial Monitor
Connect the XIAO ESP32-S3 via USB and open a serial monitor at 115200 baud to view startup messages and GPS parsing output.
Test NTP Server
# Query NTP and check offset/stratum (macOS/Linux)
ntpdate -q <ESP32-IP>

# Detailed NTP packet inspection
ntpq -p <ESP32-IP>

# Using sntp
sntp -d <ESP32-IP>
Expected output when GPS has a fix:
server <ESP32-IP>, stratum 1, offset 0.000xxx, delay 0.00xxx
Expected output before GPS fix (waiting for satellites):
server <ESP32-IP>, stratum 16, ...
Note: After powering on, the GPS module may take 30 seconds to several minutes to acquire a fix (Time-To-First-Fix, TTFF), depending on cached almanac/ephemeris data and sky visibility. NTP stratum will be
16until a fix is acquired.
Test Web Dashboard
- Open a browser and navigate to
http://<ESP32-IP>/ - The dashboard should display:
- GPS fix status, UTC time/date, coordinates, altitude, speed
- NTP stratum and client request count
- Sky Plot showing satellite positions and signal strengths
- Data refreshes automatically every few seconds
Test JSON API
curl http://<ESP32-IP>/api/gps | python3 -m json.tool
Troubleshooting
| Symptom | Possible Cause | Solution |
|---|---|---|
| No WiFi AP on first boot | Firmware not flashed correctly | Re-run flash.sh; check serial output |
| GPS shows no fix | Poor sky visibility or indoors | Move to a location with a clear view of the sky |
| NTP stratum is 16 | No GPS fix yet | Wait for GPS to acquire a fix (TTFF) |
| Dashboard not loading | LittleFS not uploaded or build failed | Ensure build_frontend.sh and flash.sh both complete successfully |
| Serial port not found | USB driver not installed | Install CH340 or CP210x USB serial driver for your OS |
| WiFi setup portal times out | 3-minute timeout elapsed | Power-cycle the device and try again |
Dependencies
| Type | Library/Tool | Version | License |
|---|---|---|---|
| Arduino | TinyGPS++ | latest | LGPL-2.1 |
| Arduino | ArduinoJson | v7.x | MIT |
| Arduino | WiFiManager | latest | MIT |
| ESP32 Core | esp32:esp32 | ≥ 3.x | Apache-2.0 |
| Frontend | Svelte | v5.x | MIT |
| Frontend | Vite | v6.x | MIT |
| Build Tool | arduino-cli | latest | Apache-2.0 |
| Dev Env | mise | latest | MIT |
License
This project is licensed under the Apache License 2.0.
See the LICENSE file for the full text.
Copyright 2025 twsnmp contributors

Licensed under the Apache License, Version 2.0 (the "License");
you may not use this file except in compliance with the License.
You may obtain a copy of the License at

    http://www.apache.org/licenses/LICENSE-2.0
Credits & Related Projects
- twgps — Go-based predecessor; UI/UX design and NTP logic inspired by twgps
- NTP implementation follows RFC 4330 / RFC 5905
- GPS parsing uses TinyGPS++ with custom NMEA GSV multi-constellation extensions
Contributing
Contributions, issues, and feature requests are welcome.
Please open an issue or pull request on the project repository.